We understand – not everyone has Photoshop – or maybe you’re on a computer that isn’t yours and you need to quickly make a couple changes to your files. We’ll focus here on Mac OS ( Sorry Windows People.. ) and how to use an app that comes with every Mac. If you’re the DIY type but don’t have Photoshop, then this page will provide you with a couple quick tips and tools.
Many people don't realize that Preview, the default photo & pdf viewer in Mac OS, has some very helpful tools built right in.
Resizing Files for Print
You can easily resize your own images, while keeping the same aspect ratio, and define the correct pixels per inch.
Assigning Color Profiles
You can also assign the correct color profile for print in a couple quick clicks. Scroll down to get started and learn more.
To start, simply open a file in Preview by double clicking it. You can also right click or, on your keyboard hold [ control ] + click, and then go to “Open With”, and then “Preview”.
You've got a file open, now let's get started.
What to do:
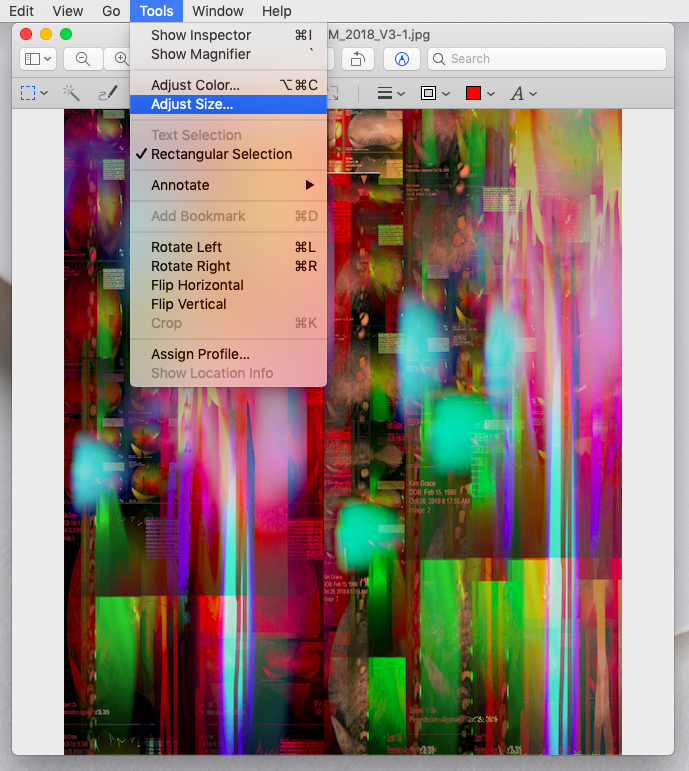
Click on the "Tools" menu in the top left portion of your screen, and go to "Adjust Size".
Quick Tip
After the changes you make on the next step, be sure to remember to "Save As", and don't save over your original file.
Height, Width, and Resolution.
What to do:
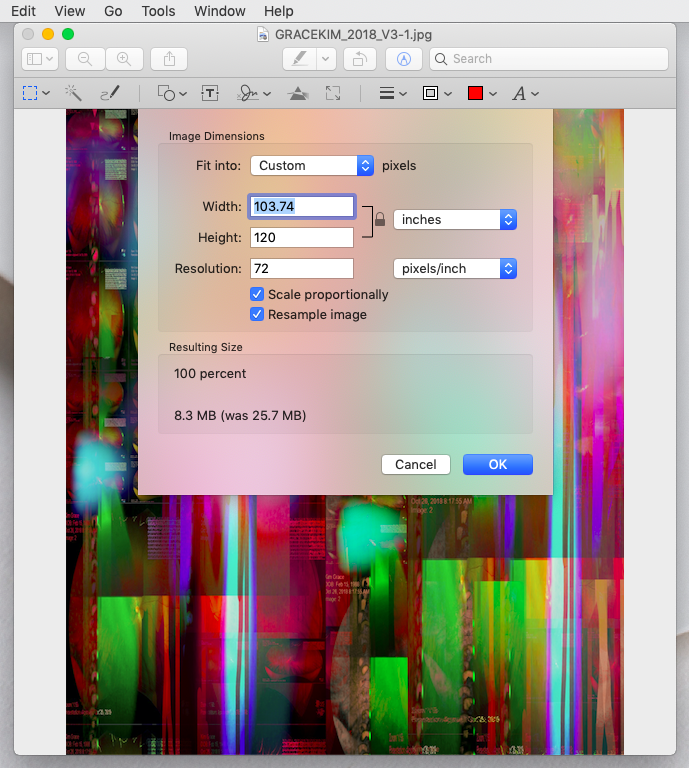
Start by making sure the little lock icon ( next to the word "inches" ) is locked. This will ensure that you don't distort your image. Keep in mind, we're assuming - at least for now - that you have your image in the aspect ratio ( and crop ) that you want, and simply need to resize it.
Changing the size without creating a problem:
There is a checkbox for "Resample image" ~ uncheck that. This becomes the gauge for making sure you don't increase the size too much, and prevents you from creating a pixelated mess. With "Resample image" unchecked, now change either the height or width to your desired dimension, while making sure resolution does not drop below 150 pixels/inch.
Don't forget, Save As, so you don't save over your original file.
It's also helpful to name your file in a way that reflects the size and resolution, for example: "NewPainting-12x18-200ppi".
Assign a Color Profile for Print
What to do:
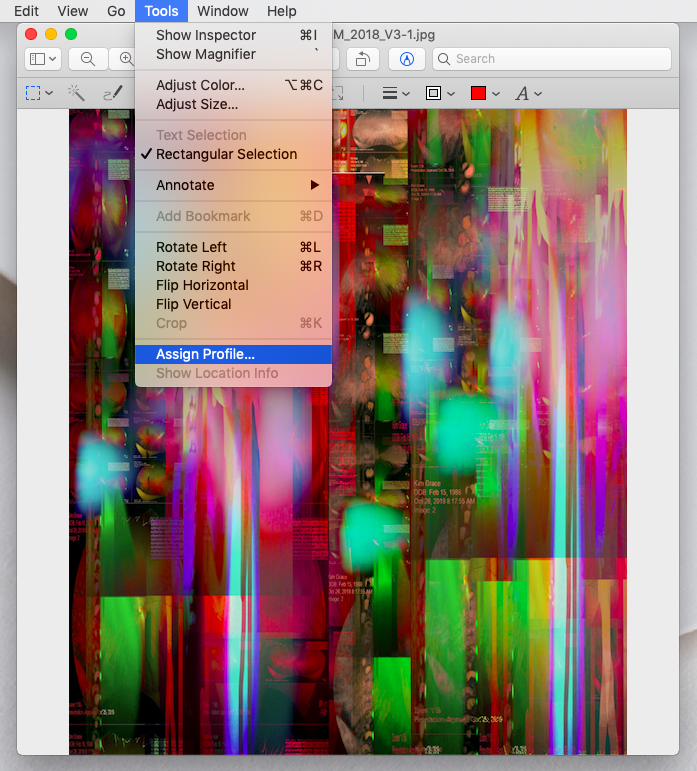
With your file open in Preview, click on "Tools". At the bottom of that menu, you'll see something that says, "Assign Profile". Click on that, and on the drop down menu that appears, select "Adobe RGB 1998". Now click Save, and you're all set.
A Quick Tip:
This gets us off to a good start and helps you get on the same page with us, in terms of color. If you work with us regularly, you can request the custom profile that we use to print your work and we'll show you how to soft proof your prints on screen. That does require Photoshop - or something similar - but once you get to that point we'll be happy to help.