INTRO TO CREATING 3D TEXTURED FINE ART PRINTS
These are some of the most common ways to approach the creation of files required to print texture using our textured UV flatbed printing services.
Defining Goals & Scope of Work
Every textured printing project that we do is different from the last. Each one requires a custom approach, and cannot be quoted until we define the goals, expectations, and full scope of work. This generally requires a phone consultation, at minimum, and as much as you can define what you have in mind – in advance – the better it is for everyone.
The correct amount of texture?
It is important to understand that this type of project is always very custom, and each one is unique. The only way to get a tangible sense of what your file will look like after printing is to test. After your project consultation we will recommend a custom approach to testing based on your overall scope of work.
How long does this take?
With consideration of the initial consultation, file preparations, testing, and production – on average – these projects generally take a minimum or 3 – 4 weeks.
Basic principles regarding textured UV printing:
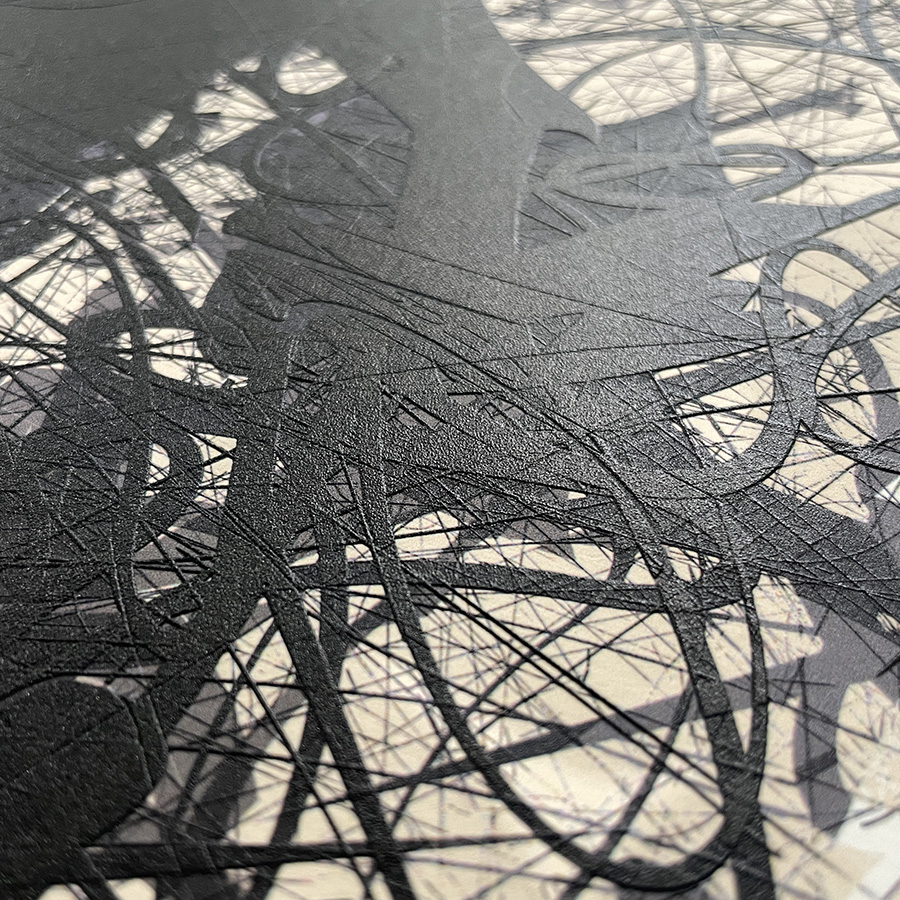
- Darker colors print with more physical thickness / elevation.
- High contrast height maps, sometimes called ‘displacement maps’, are most effective for building texture.
- Black, for example, produces more texture than light gray.
- Texture layers do not have any exact thickness that can be calculated.
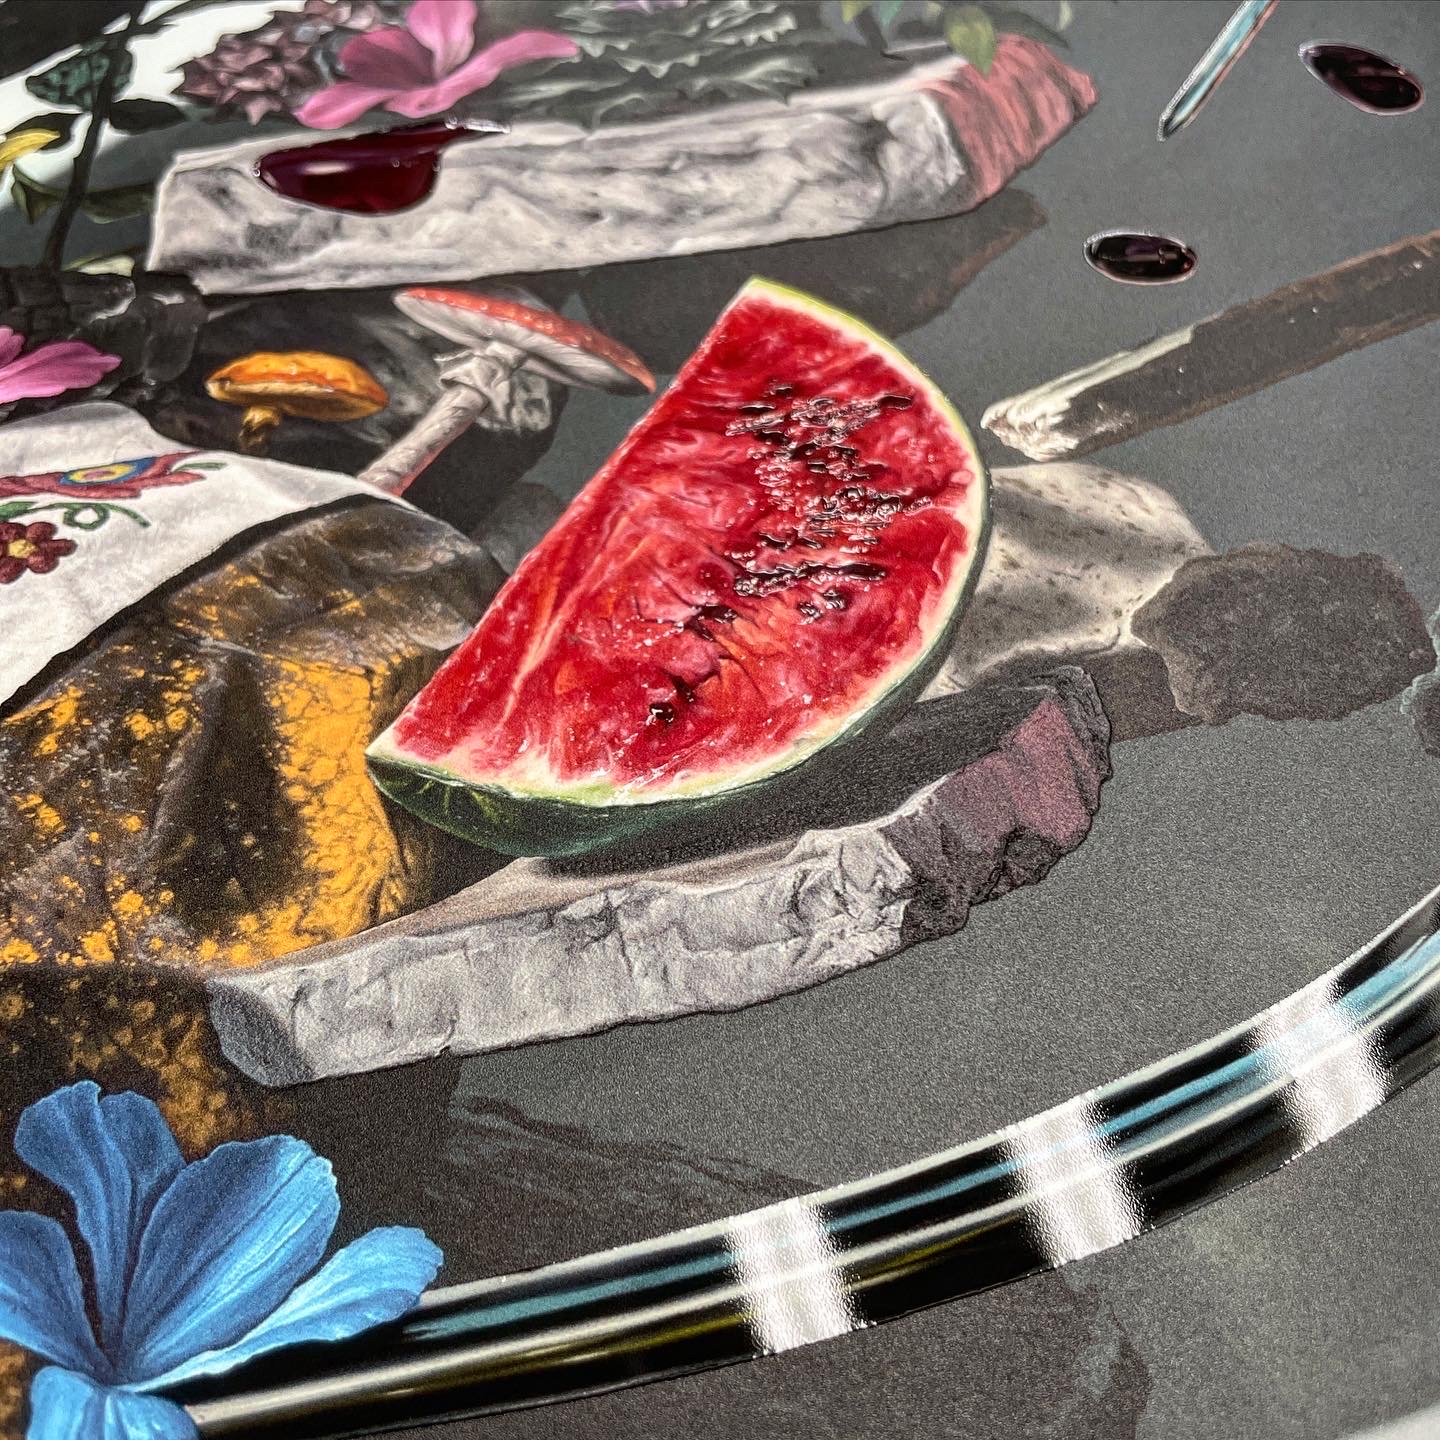
- Texture is generally printed first, followed by opaque white, then the final image.
- UV inks are slightly translucent, so think with layering accordingly.
- More layers = more print time = higher print cost.
- A print with 1 – 1.5 mm of actual physical texture is much more visually significant than it sounds.

Additional Notes & Key Points
- Textured prints generally work the best on flat, rigid materials or smooth hot press papers.
- Printing texture on a material that is already textured can be problematic.
- Creating texture from digital art, AI art, NFTs, is entirely possible, but requires a consultation.
- Textured prints can be selectively spot varnished.
- A vast array of widely available PBR textures can be utilized for creating textured prints.
What you will need to get started:
- Clear Intent // What you are hoping to achieve with printed texture?
- Height Map or Layered File // A greyscale displacement map or a layered photoshop file that clearly defines what is going to become printed elevations if building a layered file, this needs to be at print resolution and your displacement map should be aligned and registered with your final print layer.
- Substrate // What do you want to print on?
- Size // What size are you hoping to print?
- Deadline // Keeping in mind that these projects are not available on a rush basis for those who are new to this print method.

Regarding Height Map Creation
- Download an example zip file containing 2 files that represent two ways to print texture.
- File 1 // Printed elevations using one layer for texture, printed multiple times to desired height.
- File 2 // Printed elevations using multiple layers, designed to stack consecutively. This file is natively created using specialized scanning equipment at our studio.
- We can, in many cases, create a height map as a service, but please inquire for details and pricing.